For an up-to-date version of the deployment documentation, please refer to the repository’s documentation.
As we are reaching the end of this semester (again), we would like to briefly outline how easy it is to deploy our project.
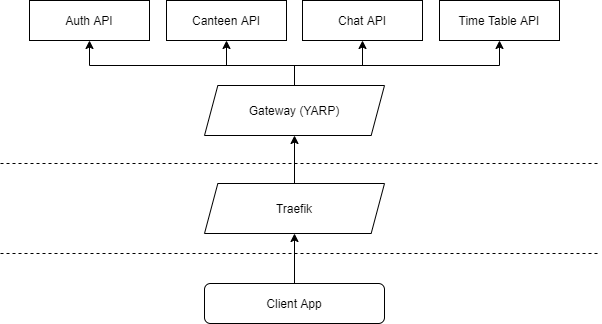
Unidash consists of a single front-end and back-end assembled as various microservices. These services are behind a central gateway:

This setup makes it fairly easy to extend our project and it’s straight forward to deploy.
For deployment, you need:
- At least 4 GB RAM
- A host that is accessible from the outside
- A running Docker instance with Docker Swarm fully set up
If you meet these requirements, great. All you need to do is to adjust this docker-compose file and chuck them into your Docker stack. We will guide you through it.
Deploy the Back-End
The first step is to customize your Docker compose file:
Please notice that you will need to alter some variables (${...:-default}) to fit your needs. We also have an extensive section about configuration here.
Once you’ve done this, the second step is to run the Docker deployment. To do so, save the compose files and run:
docker stack deploy unidash -c docker-compose.yml -c docker-compose.dev.yml -c docker-compose.traefik.ymlDeploy the Client App
You can deploy the client app in many ways since it’s just a Single Page Application and runs anywhere you can host static files.

We recommend using Docker. It’s fairly easy to run.
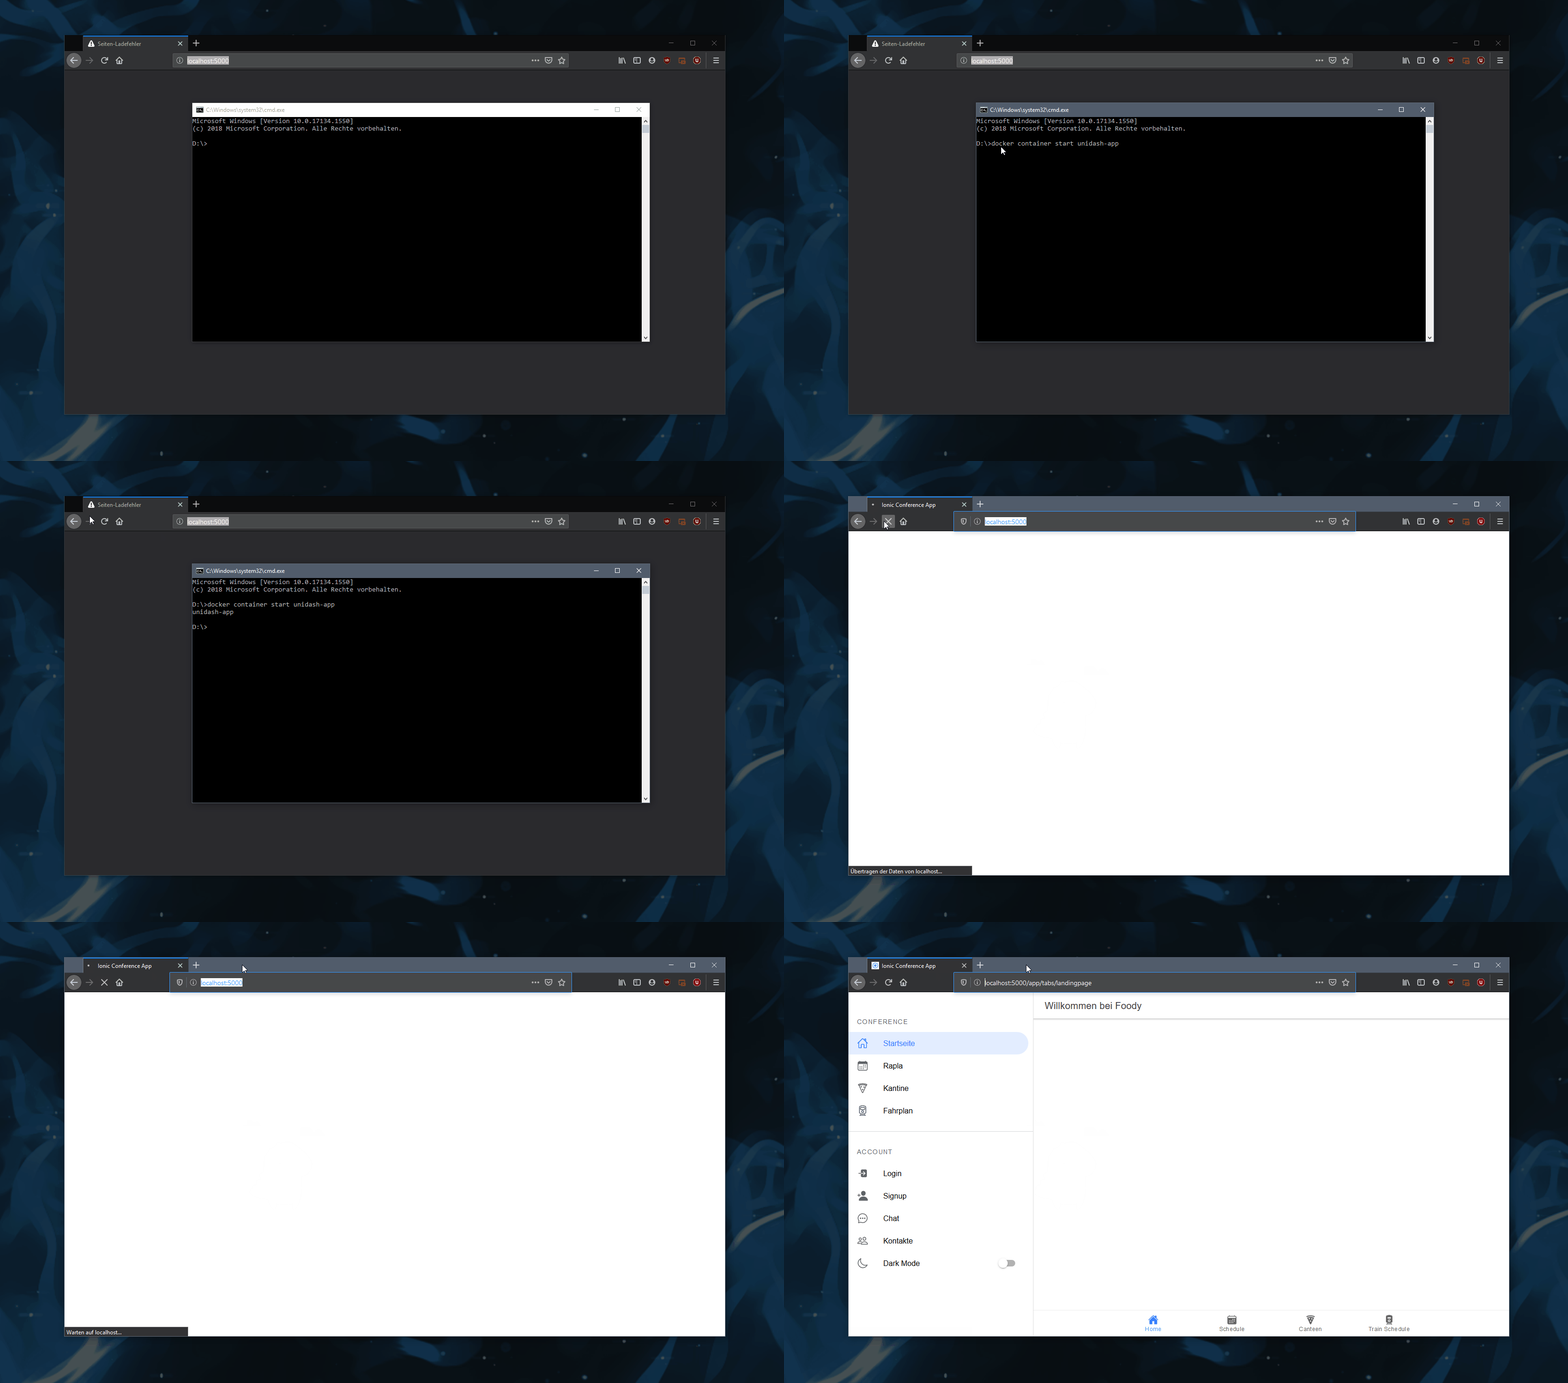
To do so, execute the command:
docker run -d -p 80:5000 --restart always --name unidash_app unidash/appThanks to Dominik at Aniflix for being one of our test subjects and providing the GIF.
Congrats, you can now access the client app by accessing port 80.
Alternatively, you can also include this Docker container as a Docker service to the previous Docker Stack. That will give you support for Traefik and HTTPS.